Getting great results when you print black and white photos from home is easier than you think. Printing digital photos from home gives you more control over your shots and lets you experiment with different styles to find your unique vision. And thanks to new print technologies, home photo development can be done more inexpensively than ever before, all without allocating a bunch of space in your apartment for a dark room!
Whether you’re printing from home or just looking to improve the quality of your shots in the digital space, here are some tips on how to improve your shots.
POST PROCESSING
Getting the best possible results from your shots means more than just flipping the color to grayscale and adjusting the brightness. Meticulous post-processing, along with using some secret tricks of the trade, will help you achieve a range of results you thought was only possible with film photography.
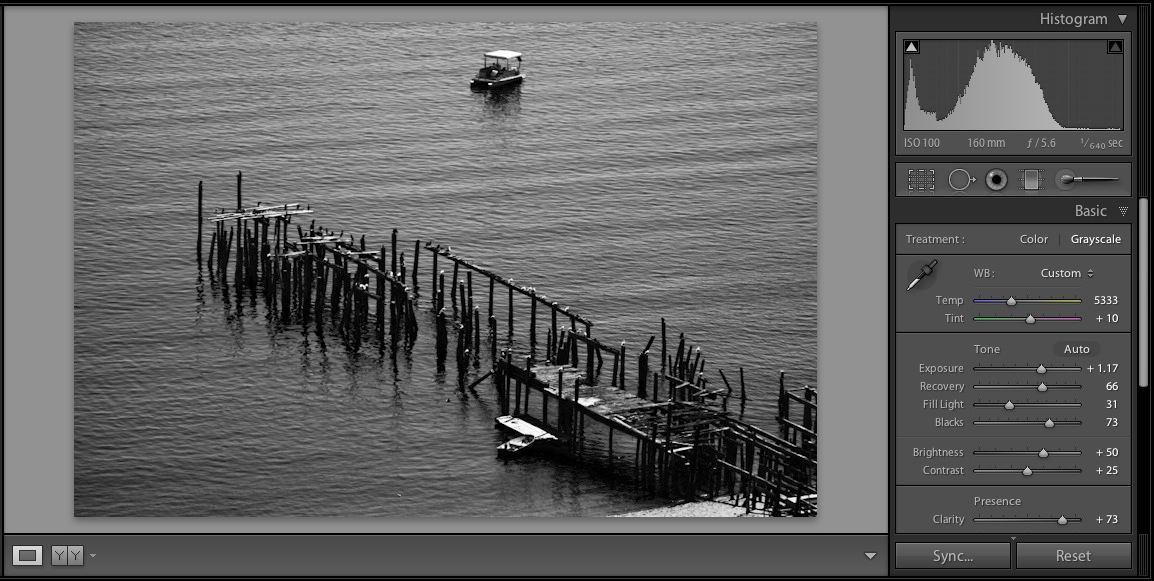
Choosing the right post-processing software is the first step. Adobe® Lightroom combines elements of Photoshop and other image editing programs under the Adobe umbrella but tailored to efficiently address the specific needs of pro photographers. Most importantly, it’s a database driven program that allows for easily editing photos in bulk without altering the original image data. That means you can work through a lot of photographs and experiment without worrying about changing your original photo file if you make mistakes.
Tone
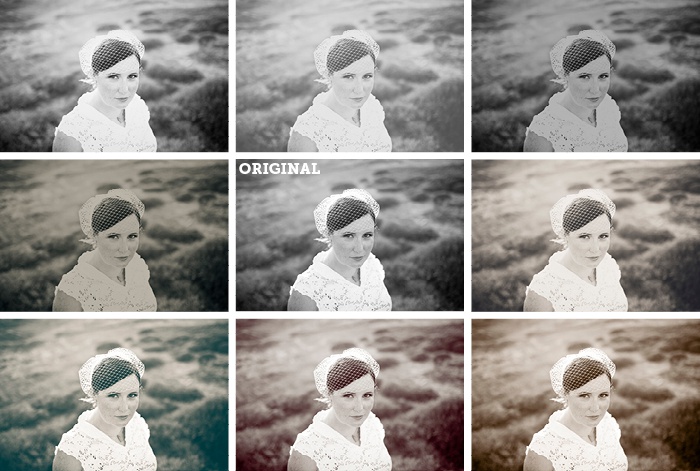
There’s a whole lot more to black and white tones than meets the eye. Varying degrees of warmth and coldness in your black and grey tones can affect your composition and may connect with some subject matter differently than others. Pure black and white tones come across as sterile and cold for a lot of shots, especially portraits and children. Alternately, too much sepia tone in your landscape can dull the contrast and make it look processed. Managing your tone to find a proper balance will depend on your personal taste and chosen subject of study. Keith Cooper at Northlight Images assembled a great guide to black and white toning that is a marvelous window into some best practices, and how to get the most out of your shots.
Noise
While the emergence of digital photography has made low light shooting easier, noise is still an important consideration you need to note. In film, noise describes image distortions and film grain that result from using film that can’t handle the amount of light in the photograph. In the digital world, it comes in the form of blurriness, pixelations, and grainy distortions common in nighttime photography. Noise becomes more apparent when you convert color images to black and white, where the sharpness and contrast of your image becomes a compositional centerpiece. It also becomes very apparent when you digitally lighten darker images. Cleaning up noise can be done to some degree changing the density settings in Lightroom, and in many cases printing images can help smooth out noise that is more noticeable on backlit HD digital screens. Above all, be conscious of your camera settings when shooting in low light situations, as too much noise can distract from the subject in your shot. It is worth mentioning however, that a bit of grain can sometimes amplify the effect of a monochrome photograph.

Sharpening
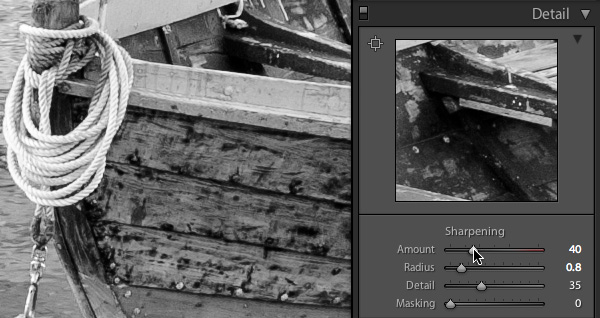
In lieu of color, black and white photos rely on light-and-dark contouring and texture to get the right look. Sharpness is very important to this end, and learning to sharpen smartly can make a big difference in your overall design. Keith Cooper recommends “selective sharpening,” which involves emphasizing the detail in selected features rather than sharpening the whole print. Putting specific focus on nearby trees or rock outcroppings can trick the viewer into thinking the space in between key features is also detailed. This is especially important for photographers who want to print their images in larger proportions for sale online and at gallery shows. He also recommends sharpening to the distance your intended viewer will observe your shots from, rather than sharpening them to the distance you sit from your computer monitor. The human eye works to calibrate what you see based upon a series of different factors, and one of the biggest is distance. Keith suggests the Nik Sharpener Pro 3 plugin for Adobe Photoshop and Lightroom, which he uses to achieve remarkable sharpness in his large-format landscape prints.
Tweak colors in HSL panel
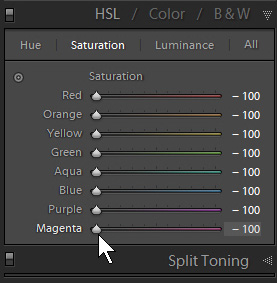
Converting color photographs to black and white can be as easy or complex as you’d like it to be, but the differences can be pretty stark. One great trick to take your black and white prints to the next level is to go back and tweak your original color composition. The HSL panel in photoshop is where you manage the saturation, warmth, hue, and luminance of your photos. Changing these levels to better emphasize your light balance, contrast, and the richness and depth of grey tones will create amazingly deep black and white imagery once you convert. The good folks at Improve Photography have a great guide on how to get more out of your B&W imagery using this technique.
Adobe Lightroom Plugins
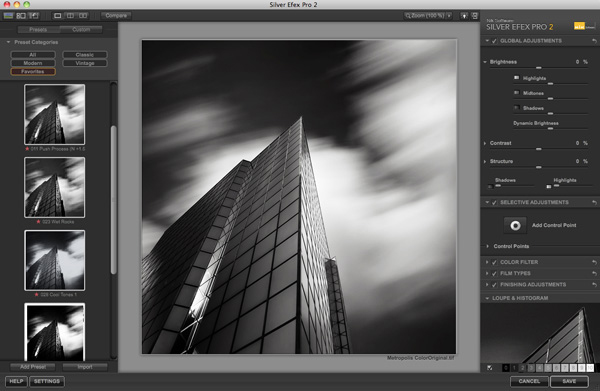
Adding plugins to your Adobe Lightroom setup will expand the range of what you can do converting and processing your black and white images. Among the most popular is Silver Efex Pro 2 which opens up a whole new world of professional grade tools at your fingertips. Here’s a great recap of what you can do with Silver Efex Pro.
MATERIALS
Choosing the right materials to get the job right can be overwhelming at times. Dozens of manufacturers tout the quality of their products, and trying out each of them to find the best gets expensive quickly. To help get you started, here are a couple surefire winners:
Paper
Choosing the right paper for your artistic vision can be tough. Among the other factors in the printing process, your paper will have the greatest effect on how your photos turn out—specifically with regards to how deep your black tones turn out on the page. D-max is a commonly-used term that describes the deepest black a paper and ink combination can produce. Different paper finishes will affect your D-max: semi-gloss papers often create deeper black tones than matte papers, for example. If achieving stark and deep black tones in your photography is important to your overall vision, looking into the D-max of your paper choice before you buy gives you a window into the type of tones you can expect.
Beyond darkness, there are other facts you’ll want to take into consideration. The weight of your paper describes the thickness of the page. Chances are you are going to want a heavier stock for anything that will go on display. For prints that are less likely to fade and degrade in image quality over time, you will want acid free archival paper to help preserve your shots. Epson® Velvet Fine Art paper is one example of a popular acid free museum-grade print paper that comes in a good heavy stock.
Inks
When shopping for an inkjet printer, chances are you’ll come across two types of ink: pigmented inks and dye-based inks. Pigmented inks are the better choice for photography, as they are designed to last longer and stand up to sunlight and other environmental factors without fading. Most professional grade printers include pigmented inks. A second factor to look into when printer shopping is the number of individual inks the printer contains. Most budget-level printers print color with four colors: cyan, yellow, magenta, and black. Photo quality printers will usually have between six and twelve individual ink pots. The best printers for black and white photography will have three or more monochrome ink pots in shades of black and grey (and often a matte and photo version for each).
Drivers
Printer drivers take the information on your computer and convert it into data your printer can use to create an image. All printers have drivers that are suited for the intended use of each machine. Advanced photo printers can be paired with custom drivers known as Raster Image Processors (RIPs) that give you an additional range of tools to manage your print quality. They can help prevent color casting from your print and pair your paper to the type of light your image will be displayed under, making the little adjustments that will make an image appeal to the eye automatically. Popular RIPs such as ImagePrint RIP and QuadToneRIP, can get expensive very quickly—and even cost as much or more than your printer—but if you are looking to create darkroom-quality photo prints at home, they are an investment to consider.
PRINTERS
Budget-Friendly Options
For the hobbyist and dedicated amateur photographer, you can get very good results at home purchasing a dedicated photo printer. These printers are designed to give you good quality photos without spending a fortune. Here are a couple of our favorites:
Epson Stylus Photo R2000 Inkjet Printer – This high-grade printer features matte black and photo black inks, and can handle a wide range of paper types (glossy, semi-gloss, matte)
Epson SureColor P400 Wide Format Inkjet Printer – Another model from Epson, this printer similarly features matte black and photo black inks to give you a range of black and white tones. It can handle a thicker weight papers, including glossy, semi-gloss, and matte.
Epson SureColor P600 Wide Format Inkjet Printer – A great intermediary between a budget-friendly photo printer and the type the pros use, this printer features 9 inks and includes matte black, light black, light light black to increase the range of grayscale tones you can achieve. It also has auto switching black ink technology and a wide format design so you can print oversized pages.
Larger, More Professional Printers
For professional photographers looking to print gallery-sized monochrome photos, there is a wide range of professional-grade printers that can print your photographs with stunning clarity. Many of these printers are quite large and can print upwards of 24, 36, even 44 inch width. If you’re looking to build a mini photo printshop in your home or studio, here are a couple of our recommendations:
HP® Designjet Z2100 Photo Printer – This thermal inkjet features 8 individual ink cartridges and includes light gray, matte black, photo black—designed to offer incredible tonal range for black and white photography.
Canon® PIXMA Pro-1 – It’s hard to beat the Canon PIXMA line. This model is a professional printer for the professional photographer, and is designed to be especially good for monochrome photos. It features a higher capacity ink tank than its rivals, which means you can print more photos in between resupplies. This printer features Canon’s patented 12 LUCIA pigment ink system, and includes matte black, photo black, dark gray, light gray, gray inks. This printer is designed with black and white photogs in mind.
Canon imagePROGRAF iPF5100 large format printer – The next level up from the PIXMA Pro-1, the imagePROGRAF line of large format printers allows you to print photo-quality images in poster sizes. It’s great for landscape photographers who need precise sharpness on an oversized page. Like the PIXMA, this printer features the LUCIA 12-color pigment inks; including: black, matte black, gray, photo gray.
There’s a lot more to photography than just capturing the world around us. If you’ve ever fiddled with full manual modes on your camera, you quickly realize how light and color and texture interact to create a composite of the artist’s internal vision. This is especially true in black and white photography, where the expectations of the eye are turned on their head. Learning how to get the best possible results out of your shots requires practice and skill (and the right tools!) Making the time investment into improving your craft is rewarding, and the better you can articulate that inner vision into the outside world . . . the more fun it all becomes.
*Savings based on printer brand (OEM) printer prices effective as of April 25, 2023. OEM names are registered trademarks of their respective owners and are not affiliated with, and do not endorse LD Products.








What black card stock would you recommend for a black and white photo. I woud like to make Christmas cards using a black and white photo
Inkjet printers don’t print with white ink (it only has shades of cyan, magenta, yellow, and black) so printing black and white photos on black paper might not be possible. I suggest going with white card stock instead. Check out matte, satin, or luster card stock for nice black and white photo prints.