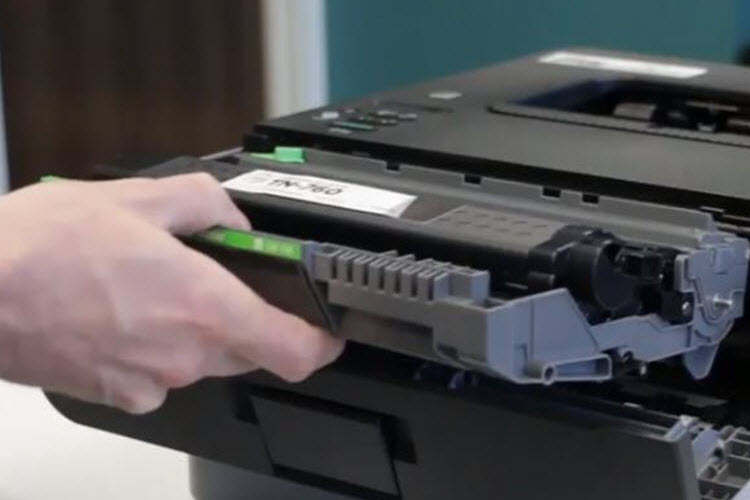
Learn how to install a Brother DR-730 drum unit and reset the drum counter with this easy guide.
The Brother DR-730 drum unit works together with either the TN-730 or TN-760 toner cartridge to create a print. Brother sells the toner cartridge and drum unit separately and the two components install together as one unit into your printer. Here, we will walk you through the replacement process step by step! If you are wondering how to replace the TN-730 toner cartridge, check out our installation article here.
When do I replace a Brother drum unit?
The DR-730 drum has a yield of approximately 12,000 pages and typically needs to be replaced after the use of 3 or 4 toner cartridges . If you own a Brother laser printer and you are getting a “Replace Drum” message on your machine’s display, it might be time to get a new drum. If you want to be extra sure it’s time to for a replacement, you can check the drum life manually too…
- Scroll through the display menu using the plus and minus buttons on the printer the display until you reach “Machine info”. Then press “ok” and scroll to “Parts Life”
- Press “ok” and select “Drum Life,” and you’ll be able to see what the current drum life is. If the drum life is low, your printer is ready for a new drum!
How to Replace the DR-730 Drum Unit
Before you replace the new drum, you’ll need to take the current drum out of the printer. It is important note – even though the drum needs to be replaced, you do not need to replace the toner cartridge at the same time. If you have a working toner cartridge already installed in the printer, you can use that same toner cartridge with the new drum. Check out our replacement video below, or keep reading to follow the process step by step.
The first thing you will want to do is open up the door to access the drum unit. For this Brother printer series, the cartridge is actually sitting in the drum unit, so you’ll need to take out the entire unit in order to separate the cartridge from the drum. It all comes out in one piece, just gently pull up and out and it should come right out. There is a green tab that keeps that keeps the toner cartridge locked into place. To remove the toner from the drum unit, pull up on the tab with your thumb and the cartridge can be removed.
Next, insert that same toner cartridge into your new drum unit, it should click into place. Once it is secure, we recommend sliding the green tab from left to right a couple of times, this cleans the corona wire and helps prime the cartridge and drum unit for the printer. Be sure to return that tab to the original position when you are done. Then, slide the entire unit back into the printer and close up the cover.
Before you start printing you will need to reset the drum counter – we show you how in the next section!
How to Reset the Drum Counter
Your Brother printer uses a page counter to track usage, which must be reset manually every time a new drum unit is installed. Drum reset instructions can vary depending on what printer you own, please make sure you are following the correct steps for your printer model. Here, we will show you how to reset the drum counter for the Brother HL-L2350DW printer.
- First, make sure the printer is on and the front cover is closed.
- Hold down the “OK” button and the “up” arrow at the same time.
- Press the “OK” button to select “Drum” and then select the “down” button to reset the drum counter.
- The drum life on your display should display as “100%” full when you check it again.
After you reset the drum counter, you are free to start printing!
Looking to save money on your Brother printing products? Check out the affordably priced LD compatible version of the TN-760 and DR-730 drum unit, available for just $34.99 each! We hope you found this guide helpful, if you have any questions about the replacement process, drop us a line in the comments!
